

openlist还是只适合管理已经存到NAS上的内容,上传下载文件全都是使用的ftp工具,最近想把手机上的照片全部传到NAS上,遂选择immich
immich部署
我选择的原版immich,下载官方的docker-compose.yml和exmaple.env文件,放在同一个文件夹内
yml文件:修改env_file的名字,使其和你下载的文件名字相同,一共有两处
#
# WARNING: To install Immich, follow our guide: https://docs.immich.app/install/docker-compose
#
# Make sure to use the docker-compose.yml of the current release:
#
# https://github.com/immich-app/immich/releases/latest/download/docker-compose.yml
#
# The compose file on main may not be compatible with the latest release.

name: immich

services:
  immich-server:
    container_name: immich_server
    image: ghcr.io/immich-app/immich-server:${IMMICH_VERSION:-release}
    # extends:
    #   file: hwaccel.transcoding.yml
    #   service: cpu # set to one of [nvenc, quicksync, rkmpp, vaapi, vaapi-wsl] for accelerated transcoding
    volumes:
      # Do not edit the next line. If you want to change the media storage location on your system, edit the value of UPLOAD_LOCATION in the .env file
      - ${UPLOAD_LOCATION}:/data
      - /etc/localtime:/etc/localtime:ro
    env_file:
      - .env
    ports:
      - '2283:2283'
    depends_on:
      - redis
      - database
    restart: always
    healthcheck:
      disable: false

  immich-machine-learning:
    container_name: immich_machine_learning
    # For hardware acceleration, add one of -[armnn, cuda, rocm, openvino, rknn] to the image tag.
    # Example tag: ${IMMICH_VERSION:-release}-cuda
    image: ghcr.io/immich-app/immich-machine-learning:${IMMICH_VERSION:-release}
    # extends: # uncomment this section for hardware acceleration - see https://docs.immich.app/features/ml-hardware-acceleration
    #   file: hwaccel.ml.yml
    #   service: cpu # set to one of [armnn, cuda, rocm, openvino, openvino-wsl, rknn] for accelerated inference - use the `-wsl` version for WSL2 where applicable
    volumes:
      - model-cache:/cache
    env_file:
      - .env
    restart: always
    healthcheck:
      disable: false

  redis:
    container_name: immich_redis
    image: docker.io/valkey/valkey:8-bookworm@sha256:fea8b3e67b15729d4bb70589eb03367bab9ad1ee89c876f54327fc7c6e618571
    healthcheck:
      test: redis-cli ping || exit 1
    restart: always

  database:
    container_name: immich_postgres
    image: ghcr.io/immich-app/postgres:14-vectorchord0.4.3-pgvectors0.2.0@sha256:41eacbe83eca995561fe43814fd4891e16e39632806253848efaf04d3c8a8b84
    environment:
      POSTGRES_PASSWORD: ${DB_PASSWORD}
      POSTGRES_USER: ${DB_USERNAME}
      POSTGRES_DB: ${DB_DATABASE_NAME}
      POSTGRES_INITDB_ARGS: '--data-checksums'
      # Uncomment the DB_STORAGE_TYPE: 'HDD' var if your database isn't stored on SSDs
      # DB_STORAGE_TYPE: 'HDD'
    volumes:
      # Do not edit the next line. If you want to change the database storage location on your system, edit the value of DB_DATA_LOCATION in the .env file
      - ${DB_DATA_LOCATION}:/var/lib/postgresql/data
    shm_size: 128mb
    restart: always

volumes:
  model-cache:
.env文件:修改以下四个变量
- UPLOAD_LOCATION 本机图片上传位置
- DB_DATA_LOCATION 将数据库文件保存在本机的位置
- TZ 时区
- DB_PASSWORD 数据库密码
如果创建postgresql数据库时没有修改用户名则不用修改DB_USERNAME
# You can find documentation for all the supported env variables at https://docs.immich.app/install/environment-variables

# The location where your uploaded files are stored
UPLOAD_LOCATION=/your/photos/locate

# The location where your database files are stored. Network shares are not supported for the database
DB_DATA_LOCATION=/your/pg/data/locate

# To set a timezone, uncomment the next line and change Etc/UTC to a TZ identifier from this list: https://en.wikipedia.org/wiki/List_of_tz_database_time_zones#List
TZ=Asia/Shanghai

# The Immich version to use. You can pin this to a specific version like "v1.71.0"
IMMICH_VERSION=release

# Connection secret for postgres. You should change it to a random password
# Please use only the characters `A-Za-z0-9`, without special characters or spaces
DB_PASSWORD=passwd

# The values below this line do not need to be changed
###################################################################################
DB_USERNAME=postgres
DB_DATABASE_NAME=immich
在当前文件夹内输入docker compose up -d即可启动拉取
immich使用
网页端配置选择
初始化的账户和配置自选即可。
存储模板
主界面右上角头像-系统管理-设置-存储模板
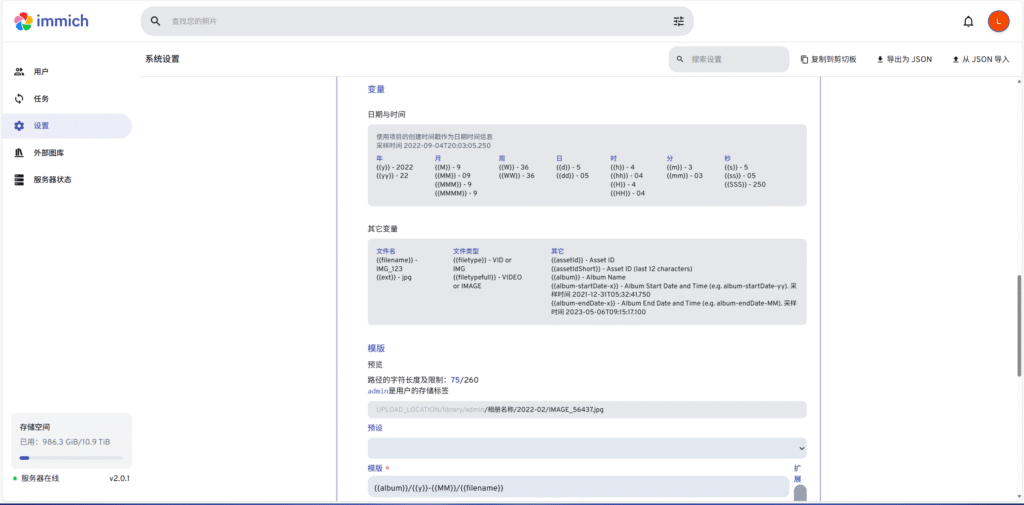
点击预设有自带的格式模板可以选,但是我自己设置了一个{{album}}/{{y}}-{{MM}}/{{filename}},它会影响本机上的照片文件组织形式,在上方的预览行即可看到
配置完成后,仍需在“任务”中启动“存储模板转化”将原有的文件形式(如外部图库)转化为模板的形式

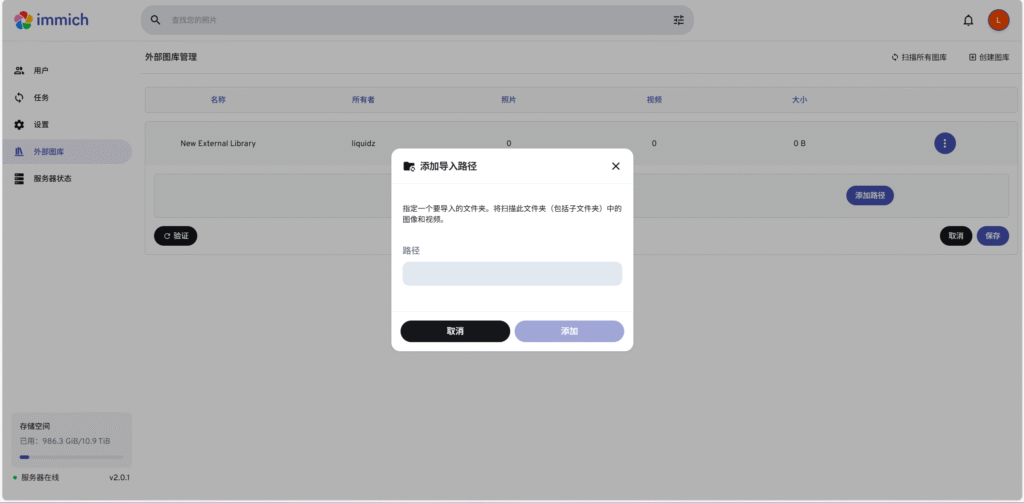
外部图库
如果已经有一个存储照片的文件夹在本机上怎么办,先进行目录挂载,有两种方法,可以在docker-compose.yml文件的immich-server部分找到volumes配置下方添加,也可以直接把图库拖到UPLOAD_LOCATION的位置内
直接选择导入外部图库,就在“设置”的下方!!!先创建图库,再添加路径即可
移动端使用
依旧在官网下载apk或ios文件安装即可,连接服务器登陆账号,点击右上角的云朵标志,选择要备份的相册后启用备份即可

本地文件组织形式
immich
├── backups #数据备份
├── encoded-video #转码后的视频
├── library #上传后的保存位置
│     ├── admin #管理员标签,不会以用户名命名
│            ├── 2025-07 #我的存储模板的管理形式,没有相册直接显示日期
│            ├── 旅游 #有相册先显示相册
├── profile #头像
├── thumbs #缩略图
└── upload #上传文件夹
其他
两天体验下来,最大的问题在于手机自动备份的相片不会保持手机中的相册分类,需要上传后手动重新分(6000多张图片,要死了),以及无法隐藏默认主页(相片)的显示涩涩图片藏不住了QAQ
链接
immich下载地址 https://github.com/immich-app/immich
Comments NOTHING